Design & Objects

Objects

Page Elements

Creating Page Elements - Detail Lines
Detail lines represent the repeating information in a form, which may be of different structures. In an Invoice you may have product lines, comment lines, tax lines and so on, all are detail lines.
To define a Detail Line:
- Select Add detail line from the Define menu.
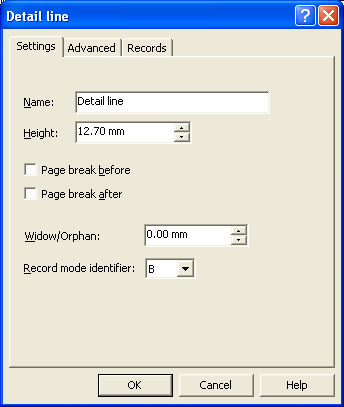
- On the Settings tab set:
- Name - the name is used as a reference for the detail line.
- Height - set the height of the detail line to accommodate the text objects that represent the detail information and any formatting objects such as extra lines or boxes.
- Page break before - a new page is generated before the detail line prints (used for internal detail-level headers within the document).
- Page break after - a new page is generated after the detail line prints (used when totals other than document totals are included within the detail lines).
- Widow/Orphan - the widow/orphan value defines the additional space (besides the height of the detial itself) that must be available at run-time in the Detail Area in order for the detail line to be printed. If the available space is less than the space required by the widow/orphan value, the detail line will not be printed on this page and will instead be carried to the next page. This is used for within-detail-area structures so as not to show just a header and/or total on a page by itself.
- This is used for within-details structures such as embedded costings comprising Title, Detail Lines and Total or used to throw a new page for totals where the detail lines flow down into that space. Examples of both are below.
- Records mode identifier - a letter of the alphabet (uppercase) used to uniquely identify the detail line (only applicable in Records Mode).
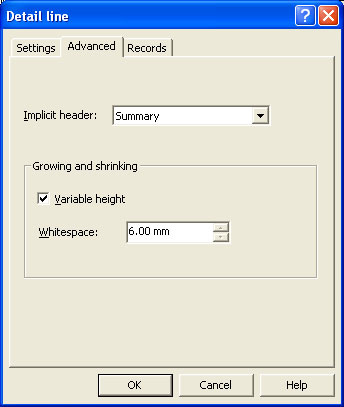
- On the Advanced tab:
- Implicit header - an existing implicit header can be associated with the detail line. When the assigned detail line is first found in the data the implicit group header prints the table object for that group of detail lines, before printing the associated detail line.
- Growing and Shrinking - detail lines can be defined to dynamically resize at run-time in order to accommodate variable text or other objects within the detail. This is most useful when text objects on the detail contain multiple fields, which can result in paragraphs with a varying number of lines, depending on the input data.
- Detail lines defined as being of variable size can also have an arbitrary amount of white space set to follow the printed detail. For example, this feature ensures a consistent space between paragraphs on a letter form.
- Tick the Variable height checkbox and enter a value in the White space text box. This creates a margin between the current detail line and the next detail line.
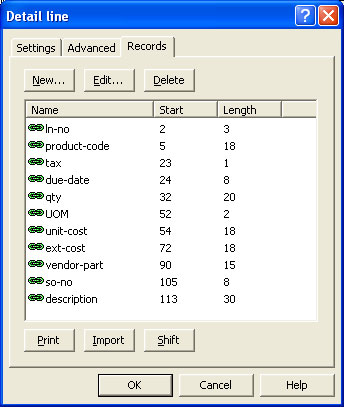
- On the Records tab, define the fields for this detail line. FormTrap can then properly extract the data from the input file.
- More information on Defining Fields in Print Line Mode
- More information on Defining Fields in Records Mode
Widows and Orphans
These terms relate to headings with nothing following on the bottom of a page (Widow) and totals at the top of a page (Orphan) and both are considered bad practice by form designers.
To illustrate, let's look at a within-page set if calculations as shown below:

Where this spans a page, we want at least one detail following the heading and at least one detail preceding a total. Records have these heights in the above structure:
| Heading | 65 |
| Detail | 50 |
| Total | 65 |
The minimum record set is one each of Header, Detail and Total, however more detail records may be found in different forms.
This is how we set Widow/Orphan for the Type B (Title), allowing for one each of the Detail and Total records as minimum remaining space:
Type C (Detail) has Widow/Orphan set to 65 (size of the Total).
Type D (Total) has Widow/Orphan set to 0 as the page requirements are determined by preceding records.
Total at end of job
This is required where the Detail area overlaps on the Total area and is good practice for Records mode jobs where multiple pages are expected, with totals. This is built into QAD jobs by use of the Type X record immediately prior to the Total (subform) record. Set the Widow/Orphan on the Type X sufficient to provide space for the Total. Both go to the next page if there is insufficient space on current page. You will need to look at the height of the total as it varies between different version of the same form. In the example below, Widow/Orphan on the Type X would be 700/300th.