Printline or Records Mode
Printline Mode


Records Mode

Pre-defined Variables
Defining Fields
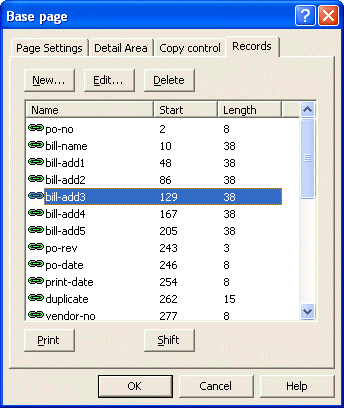
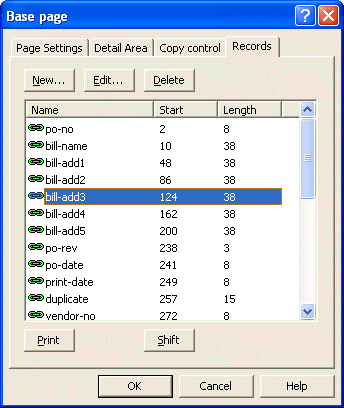
In Records mode the unique page element identifier, as the first character of that row, indicates what fields follow. The name, start position and length defines each field. While unusual, each field can also be defined as needed, as the variable text or barcode object is created.
Create fields
To define the fields on each page element:
- Select the appropriate page element on the Go menu.
- Select Properties of... from the Define menu.
- On the Records tab, click on the New... button to add a new field.
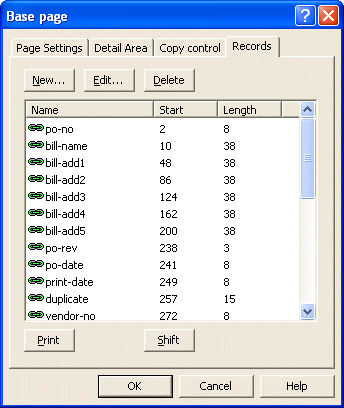
- Type in the field name, start position and length. Note, you may sub-define a field, in which case the longer field is sorted ahead of its sub-definition fields.
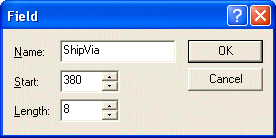
- Click the OK button.
- Repeat the above steps to add other fields to the page element.
Delete fields
To delete a field:
- Select the appropriate page element on the Go menu.
- Select Properties of... from the Define menu.
- On the Records tab, click and select the field you wish to delete.
- Click on the Delete button to delete the field.
Shift fields within a record
To shift the starting position of fields within a record:
- Select the appropriate page element on the Go menu.
- Select Properties of... from the Define menu.
- On the Records tab, click and select the field you wish to shift.
- Click on the Shift button.
- In the Shift fields dialog box, enter a positive number to increase the starting position and a negative value to decrease the starting position.

-
The starting position of the selected field and all subsequent fields will shift accordingly.