Design & Objects

Objects

Page Elements

Creating Page Elements - Base Page
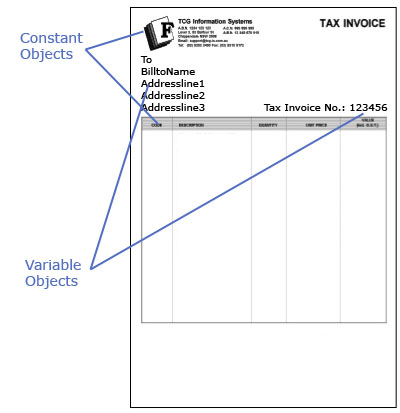
The Base page is used as a template for each new page and contains data common to all pages. Data included on the Base page is typically that which identifies the document, and appears on every page of the output.
The figure below shows a sample Base page. It contains both constant objects (objects that always appear the same when printed) and variable objects (objects that obtain their value from the data). The logo and heading are constant objects while the customer address and the date fields are variable text objects. When the form prints, the same logo and heading will appear at the top of each printed page, however, the address and invoice number are extracted from the data and change with each new document.
When you create a blank form in FTDesign, you automatically start on the Base page.
To define the properties of the Base page:
- Ensure the Base page is selected on the Go menu.
- Select Properties of the Base page from the Define menu.
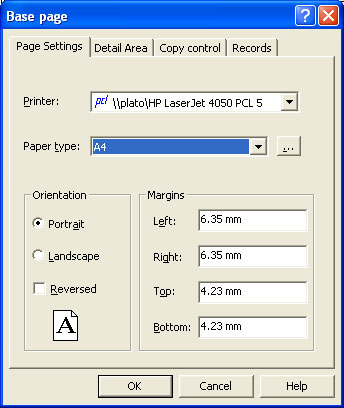
- On the Page Settings tab:
- Printer - use the Printer menu to select either a PCL or PostScript printer which you will use to design the form.
- Paper type - select the appropriate page size from the Paper type drop down menu.
- Orientation - change the page orientation of the page by choosing Portrait or Landscape settings in the Orientation frame. Check the Reversed check box for the page to print reversed (from the bottom to the top).
- Margins - modify the page margins in the Margins frame.
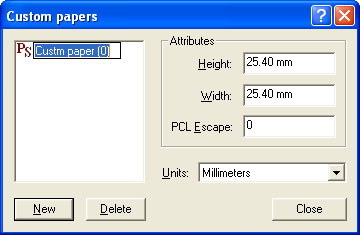
- To create a custom paper type:
- Click the "..." button to create a custom page size.
- Give the custom page size a Name, Height, Width and PCL Escape. The PCL Escape is the code sent to the printer. The PCL escape code value can be found in your printer manual. Email support@formtrap.com for other non-standard paper instructions for PostScript and PCLXL.
- Choose measurement units for the defined paper size from the Units dropdown menu.
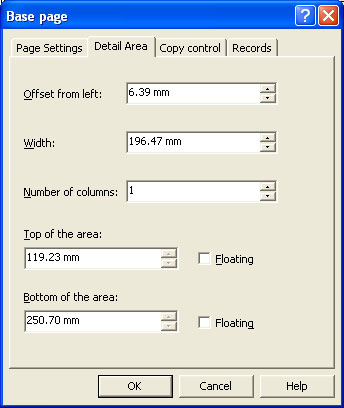
- The Detail Area tab allows
definition of the area of the form used for detail lines:
- Offset from left - left margin, between the left edge of the Detail Area and the left of the page edge.
- Width - width of Detail Area.
- Number of columns - number of columns in Detail Area. Detail lines are added starting at the top of the first column, moving down to the end of the Detail Area. When the first column is filled, detail lines are added to the top of the second column and so on. Multiple columns are commonly used in label printing.
- Top of the area - margin between the top edge of the Detail Area and the top of the page.
- Bottom of the area - margin between the bottom edge of the Detail Area and the top of the page.
- Floating - tick the checkbox to allow the top or/and bottom edge of the Detail Area float depending on the size of that page's heading adn trailers.
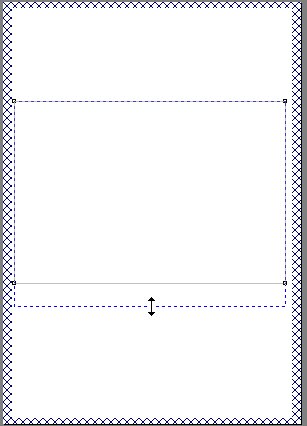
- Note: The Detail Area is delineated by a faint grey outline, which can be adjusted using the mouse by pulling the handles. This facility is only available when the base page is in focus.
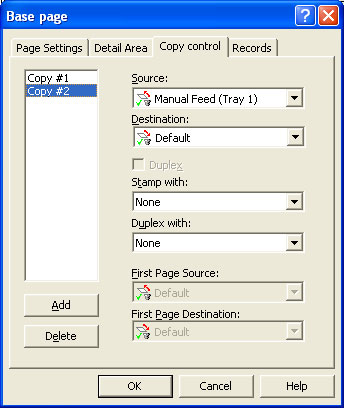
- The Copy Control tab allows definition of selected bins and/or multiple copies for up to five copies. This method requires manual decollation of copies and it is simpler to produce an alternate full copy using another similar form. (Copies are retained for backwards compatibility purposes).
- Configure each copy:
- Source - alter the paper tray FormTrap prints from
- Destination - alter the output bin FormTrap prints to. If you are using a PostScript printer driver you will need to enter the name of the output bin in the Destination text box. This information can be found in your Printer manual.
- Duplex checkbox provides double-sided printing.
- Stamp with - select a stamp/duplex sub-form from the dropdown menu to be stamped on this copy.
- Duplex with - select a stamp/duplex sub-form from the dropdown menu to be printed on the reverse of the page (assumes Duplex was ticked above to allow the stamped sub-form to print on the reverse of the page).
- If you have defined a First Page
footer, you can set different source and destination bins for
this copy.
- First Page Source - alter the paper tray FormTrap prints the first page from.
- First Page Destination - alter the output bin FormTrap prints the first page to. If you are using a PostScript printer driver you will need to enter the name of the output bin in the Destination text box. This information can be found in your Printer manual.
- Note: A PostScript destination bin must be entered in English.
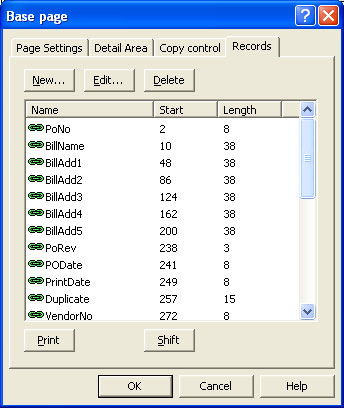
- On the Records tab, you can define the variables fields for the Base page. FormTrap can then properly extract the fields from the input file. This step is optional. Each field can also be defined as needed when the variable object is created.
- More information on Defining Fields in Print Line Mode
- More information on Defining Fields in Records Mode