|
To insert a barcode object in FTDesign:
- Choose Barcode
from the Insert menu or click the Barcode
tool button on the toolbar. The cursor changes to a
cross-hair pointer.
- Click and drag the mouse diagonally to
add the barcode frame.
- Release the mouse button and the Barcode
dialog box will open.
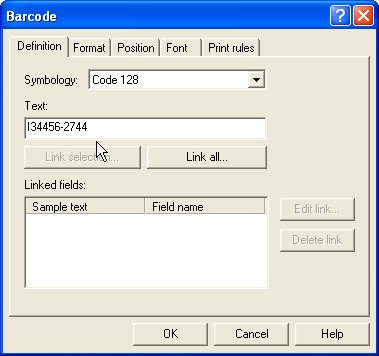
- On the Definition
tab
- Symbology
- select the appropriate barcode encoding method from the Symbology
menu.
- Text -
enter the desired barcode value into the Text
box. Click the Link selection or Link
all button to define a variable text object.

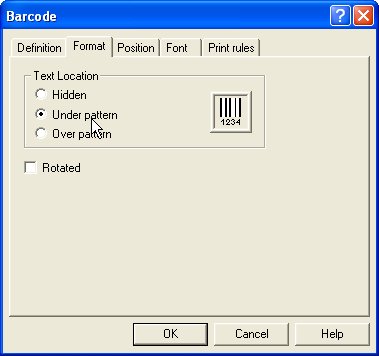
- On the Format
tab, set the attributes of the constant barcode object:
- Text location
- the value of the barcode can be hidden, or appear above or below the
barcode.
- Rotated
- check the Rotated box for the barcode to be rotated 90 degrees.

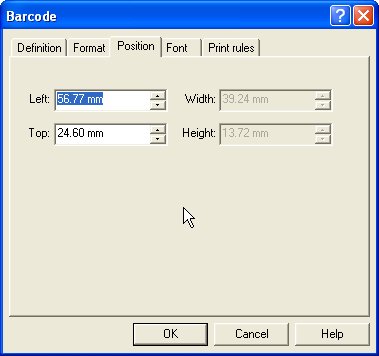
- On the Position
tab, set the position of the constant barcode object. Enter a value in Left,
for the object's offset from left value and Top,
for the object's offset from top value.

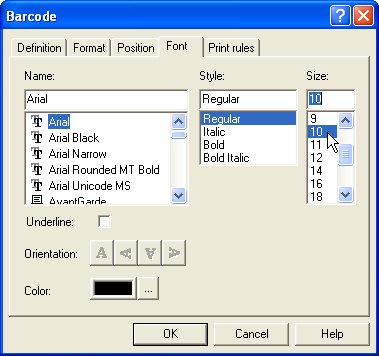
- On the Font
tab, set the attributes of the font used for the constant barcode
object:
- Name -
select the font type.
- Style -
font can be Regular, Bold, Italic or Bold Italic.
- Size -
select the size of the font.
- Underline
- check the Underline box for the text to be underlined.
- Orientation
- orientation of the text relative to the page.
- Color -
select the color of the text.

The Print rules tab allows conditions to be
set for printing of this object, see Print
Rule for an object.
To change the size of the selected barcode
object:
- Select the handles and drag to size. The
width of the barcode “jumps” from size to size as additional increments
are added to all bars and spaces. The height handles move smoothly as
the height is increased or reduced.
|
|


