Properties
Once you have finished creating the areas in the entry, you can modify the entry and area properties.
Entry Properties
To modify the properties of the selected entry:
- Select the entry in the Areas window and click
the Properties tool
 button on the toolbar, or choose Entry from
the Edit menu.
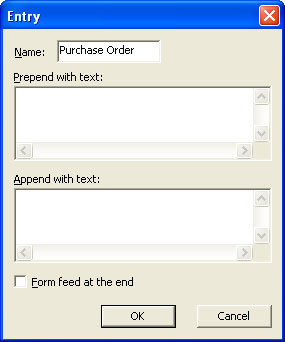
 - The Entry dialog box opens.
- Change the Name of the entry which should represent that being processed.
- To insert text at the beginning of each document, enter the string in the Prepend with text box.
- To insert text at the end of each document, enter the string in
the Append with text box. This is used to insert
##NEWDOC# which resets the page number for multiple
documents from one file. The next (Form Feed) option
is not required after a ##NEWDOC# command. To insert another document
behind this one use these commands (typically used to insert a
one-page terms and conditions document behind an invoice or PO):
- ##F#<form-name># where form-name is the name of the required form
- 0 (record mode) or just some data such as "base page" (print line mode)
- ##NEWDOC#
- To insert a form feed at the end of each document, tick the Form feed at the end checkbox.
- Click OK to save the changes.

Area Properties
Once the areas have been defined, you can modify their properties, including height and rules.
In the data area(s), you also have the option to suppress the output. This is the normal approach to repagination, suppress all that you do NOT want, leaving all of the remaining non-blank lines as the "keepers".
To modify the properties of the selected area:
- Select the area to modify in the Areas window
and click the Properties tool
 button on the
toolbar or choose Properties from the
Edit menu.
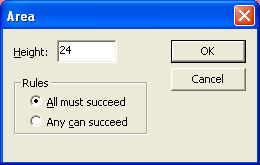
 - The Area dialog opens.
- Enter the new Height (number of lines).
- Select the properties of the rules defined on the selected area:
- All must succeed - As stated.
- Any can succeed - At least one of the rules defined on the selected must succeed to identify this area.
- Suppress output option applies only to data areas. To suppress the output of the data area tick the Suppress output checkbox. The data area icon in the Areas window changes to show it will be suppressed in the output.
- Click OK to save the changes.


